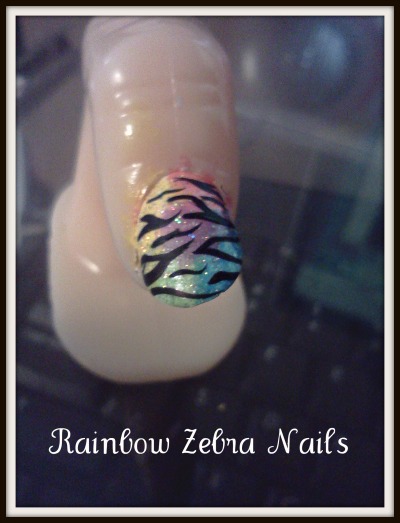
 Hey guys! Today I wanted to share with you this bright, colorful, nail design that is not only easy to do, but cute and perfect for the spring and summer seasons. I first want to say that this was done by a good friend of mine, Kylie. All of the credit goes to her ( thanks! ). She did an amazing job and be sure to watch out for some more designs by her later!
What you will need:
- Purple polish
- Pink polish
- Yellow polish
- Green polish
- Blue polish
- White polish
- Thin black striper polish
- Base/Top Coat
- Glitter / glitter polish
- Makeup wedges
- Start off by applying your favorite base coat to all of your nails. Let this dry for 2-3 minutes.
- Next, take your white nail polish and apply 1 or 2 coats to every finger.
- Before doing this next step, make sure your nails are completely dry.
- Dab a small amount of your pink onto one of the corners of your nails. Start at the very most corner and slowly work your way up to make a gradient triangle effect. Repeat in each corner and remanding perimeter of the nail. Use the pink, green, blue, yellow, and green.
- Take the left over color that is on the sponge and apply it to the center of the nail. Now your nails should have a rainbow effect.
- Let dry
- Use a sheer glittery color and apply it to all of the nails. It shouldn’t cover up the polish that is already on.
- Take your thin,black striper polish and make your zebra stripes. They don’t have to be perfect, make them kind of squiggly and uneven.
- Top it off ( no pun intended ) with your favorite top coat and your done!
Thanks! I hope you enjoy
-Megan


So cute!!!!!!!!!!!!!!!!
how did they not work??